Policy definitions or initiatives now need to be applied to take effect; this is where we select the scope. Proceed as follows:
- Click the Assignments menu on the left menu pane, then clickAssign policy, as illustrated in the following screenshot:
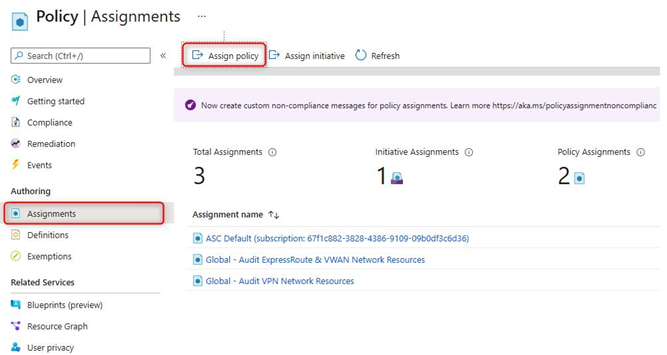
Figure 3.23 – Assigning a policy
- On the Basics tab, select a policy definition by clicking the ellipsis button (…), as illustrated in the following screenshot:
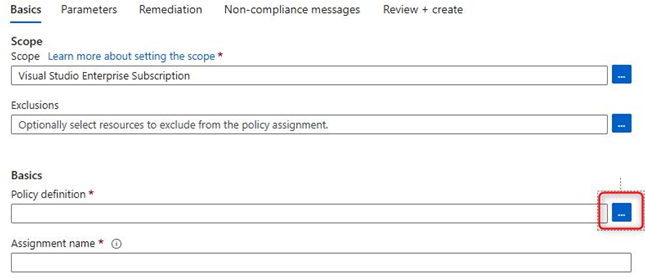
Figure 3.24 – Selecting a policy definition
- Select the desired definition and click Select. In this example, we will select Custom – Allowed Locations:
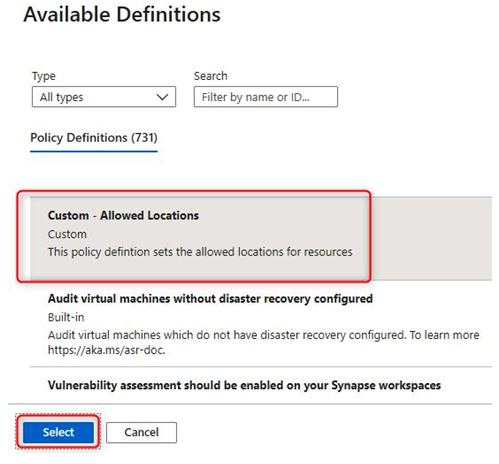
Figure 3.25 – Selecting a policy definition for assignment
- Click Next.
- On the Parameters tab, select a value for Allowed locations, as illustrated in the following screenshot. Click Next:

Figure 3.26 – Entering parameters for assigned policies
- Remediation can be configured on the next tab for non-compliant resources; this is facilitated through the creation of a managed identity that performs remediation tasks concerned with it. The following screenshot illustrates this in more detail. Click Next:
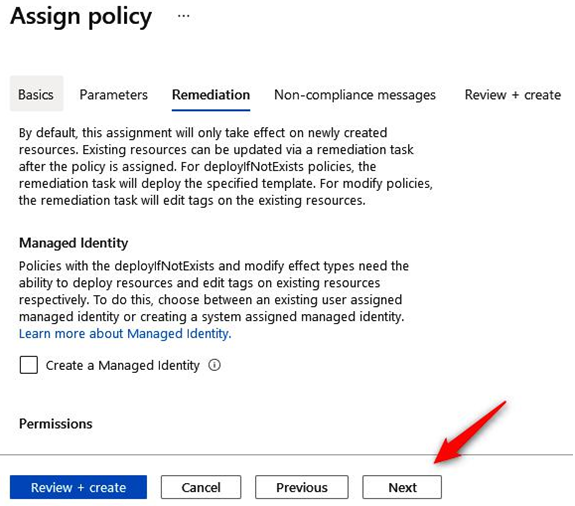
Figure 3.27 – Azure Policy: Remediation
Top Tip
Remediation is only supported for DeployIfNotExists and Modify effects.
- Enter a meaningful non-compliance message, as illustrated in the following screenshot, then click Review + create:

Figure 3.28 – Non-compliance message
- Review the configuration and click Create. A notification alert will signify a successful operation, as illustrated here:

Figure 3.29 – Success notification
- To confirm our new policy works, we will attempt to deploy a resource that will be denied by the policy. Open any resource group you have and click Create, then Marketplace, as illustrated in the following screenshot:

Figure 3.30 – Creating a resource from Marketplace
- Choose any resource to test; in this example, we will be creating a managed disk. Enter a disk name, choose an unsupported region for the policy, and click Review + create. The process is illustrated in the following screenshot:
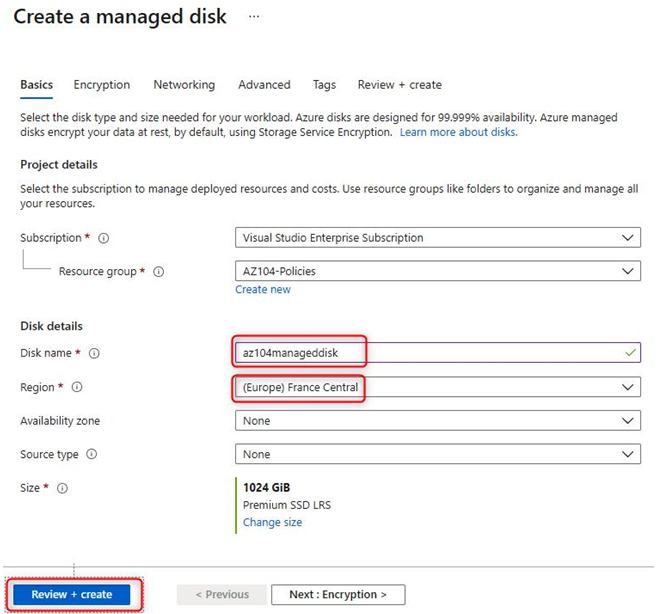
Figure 3.31 – Creating a managed disk
- After the validation succeeds, click Create. Notice here that the deployment fails due to policy non-conformance:

Figure 3.32 – Non-compliance failure message
Now that we know how to assign policies and initiatives, we will move on to see where we can view compliance for policies and initiatives.

Leave a Reply