If you have been following along so far in this book with the previous section and created an AZ104-Policies resource group, then please use that for this exercise; alternatively, use any resource group that would suit. We will create a resource group, add a delete lock, add a resource, demonstrate the delete lock effect, remove the lock, and apply a read lock to demonstrate the effect. Your user account will require Owner or User Access Administrator privileges in order to add the lock. The steps are outlined here:
- Open the resource group, then on the left menu click onLocks, then click Add. The process is illustrated in the following screenshot:
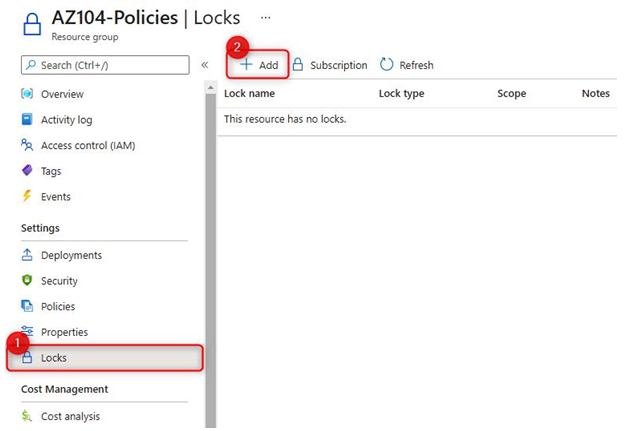
Figure 4.11 – Adding a resource lock
- Enter the corresponding lock details, such as Lock name, Lock type, and Notes values, as illustrated in the following screenshot:
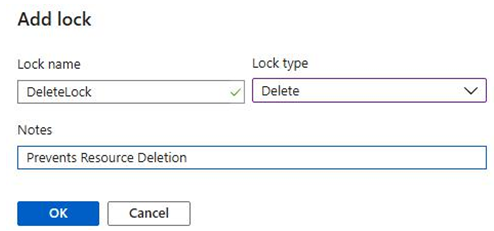
Figure 4.12 – Lock details
- Open the resource group, then click Overview on the left menu, then clickCreate, then Marketplace. The process is illustrated in the following screenshot:
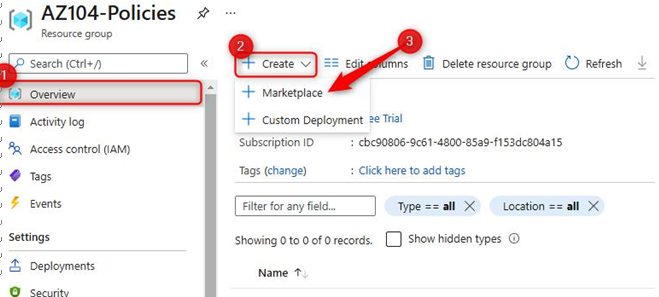
Figure 4.13 – Creating a resource from Marketplace
- Create any desired resource; we will create a storage account, as follows. After filling in the relevant details, click Review + create:
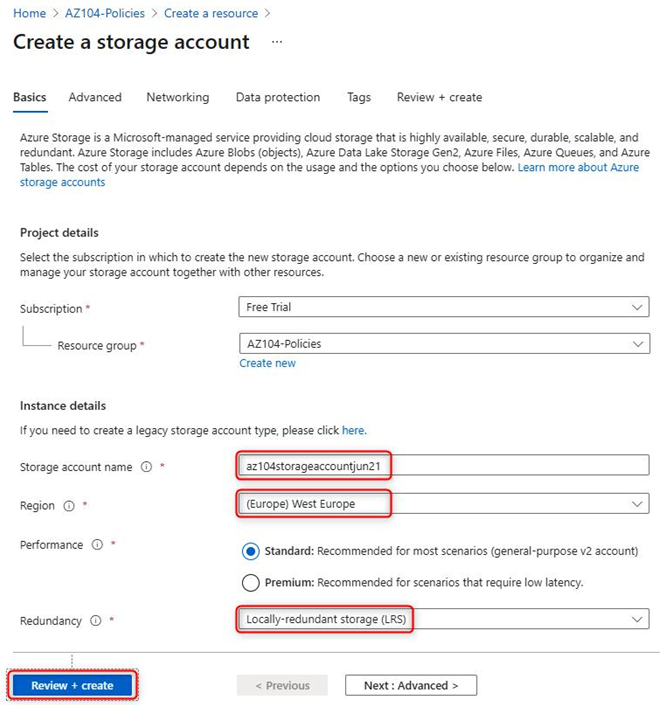
Figure 4.14 – Creating a storage account
- After validation, click Create, as illustrated in the following screenshot:
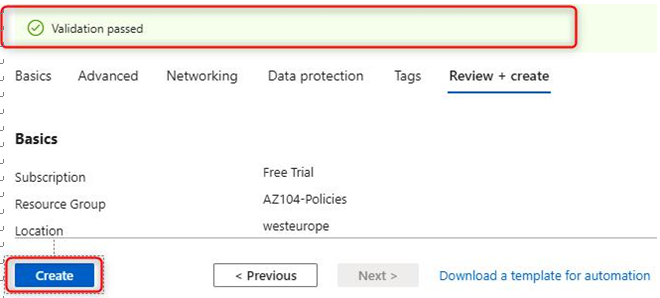
Figure 4.15 – Deployment screen
- After the deployment has completed, click Go to resource, as illustrated in the following screenshot:
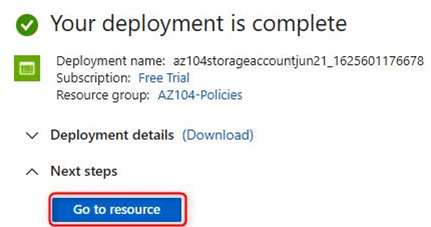
Figure 4.16 – Deployment progress screen
- Click on Delete on the top menu bar, as illustrated in the following screenshot:
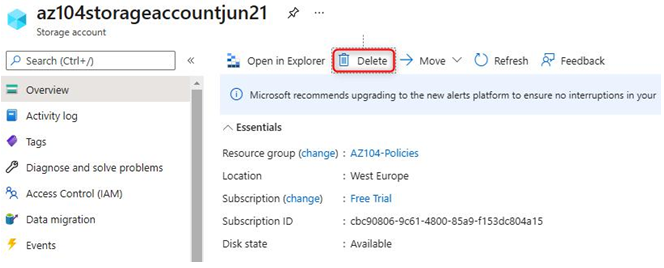
Figure 4.17 – Deleting a storage account
Top Tip
There are times you may want to delete an individual resource, which can be done as per the preceding step, and you will note the process resembles the deletion of a resource group.
- Notice here the error that follows:

Figure 4.18 – Deletion failure from resource lock
- Go back to the resource group, select Locks, and delete the DeleteLock lock, as illustrated in the following screenshot:

Figure 4.19 – Deleting a resource lock
- Go back to the resource group and attempt a deletion of the resource again. Notice here that we receive a success message this time:

Figure 4.20 – Successful deletion notification
- Open the resource group, then on the left menu click onLocks, then click Add. Enter the corresponding lock details, such as Lock name, Lock type, and Notes values, as illustrated in the following screenshot:
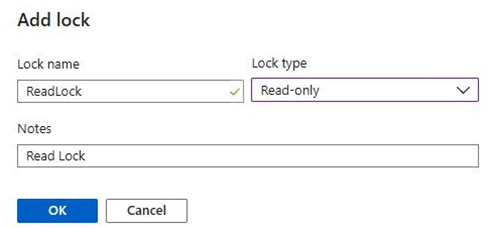
Figure 4.21 – Creating a read-only resource lock
- Open the resource group, click Overview on the left menu, then clickCreate, then Marketplace. Attempt to create any resource and notice the validation error, as indicated in the following screenshot:

Figure 4.22 – Failure to create a resource from a lock
You have now learned how to add a resource lock and prove it’s working as expected.

Leave a Reply